WiseCleaner Think Tank

Encounter difficult computer problems?
All about maintenance and optimization of your Windows System.

Home > Think Tank > How to Turn Off Microsoft-Verified App in Windows 11

How to Turn Off Microsoft-Verified App in Windows 11

May 28, 2024

Microsoft introduced a new feature in Windows 11 called Microsoft-verified apps, which is designed to ensure the security and authenticity of apps. But if you know the app you're installing isn't a security threat, how do you get around it to install any app you want? In this guide, we'll show you how to turn off Microsoft-verified apps in Windows 11 so you can install apps to your liking.

Method 1: Using the Settings App

The Settings app provides advanced controls for the operating system and application controls. This is the easiest way to turn off Microsoft-verified apps in Windows 11.
  • Open Settings.
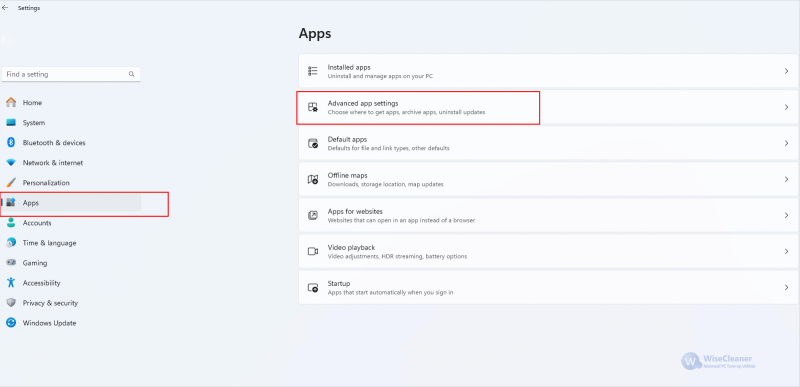
  • Click Apps in the left menu and then click Advanced app settings on the right.
Advanced app settings
  • Expand the drop-down menu next to Choose where to get apps from and select Anywhere.
Choose where to get apps

Method 2: Using the Group Policy Editor

If this is not resolved by Settings, you can use the Group Policy Editor to disable the Microsoft-verified Apps warning.
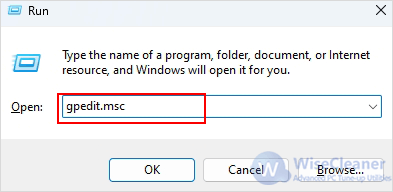
  • Press Windows+R, then in the Run window, type gpedit.msc, and click OK.
 Open Group Policy Editor
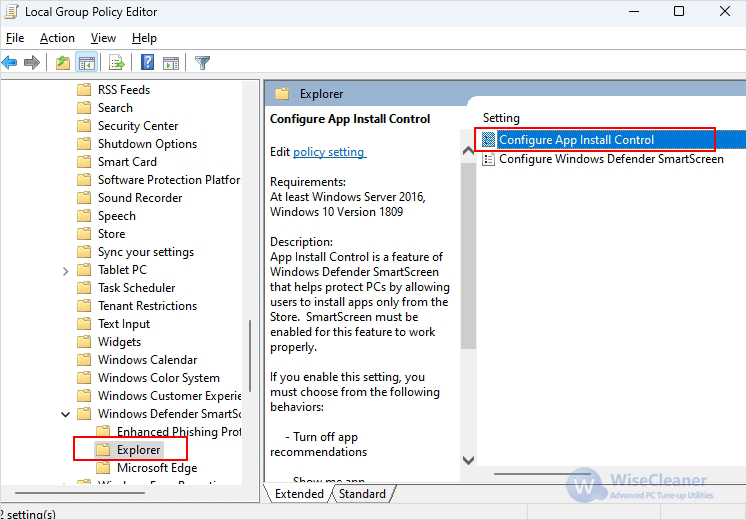
  • Navigate to Computer Configuration > Administrative Templates > Windows Components > Windows Defender SmartScreen > Explorer. Double-click the Configure App Install Control policy on the right.
 Navigate to following path
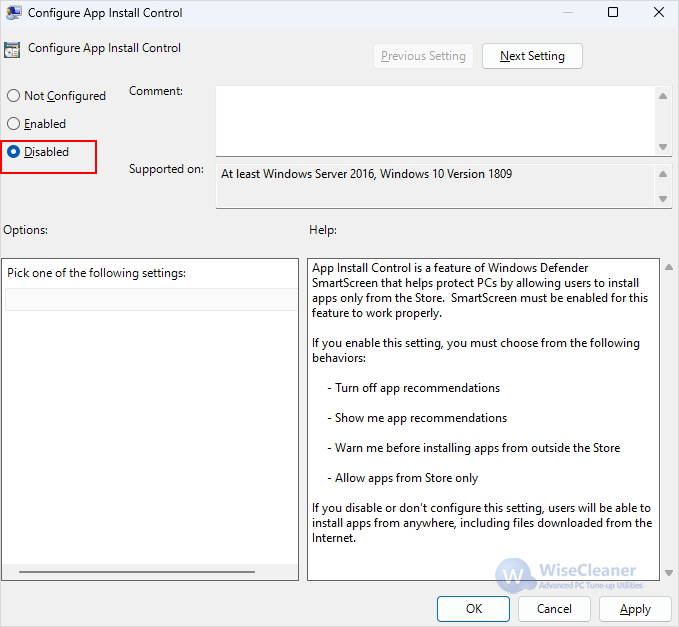
  • Select Disabled in the pop-up window and click Apply followed by OK.
  click Apply followed by OK

Method 3: Using the Command Prompt

If neither of the above methods works, then you can try using Command Prompt to run specific commands to allow unverified apps.

  • In the Start menu, search for Command Prompt and run it as an administrator.
  • Type the following command and hit Enter.
reg add HKEY_LOCAL_MACHINESOFTWAREMicrosoftWindowsCurrentVersionExplorer /v AicEnabled /t REG_SZ /d Anywhere
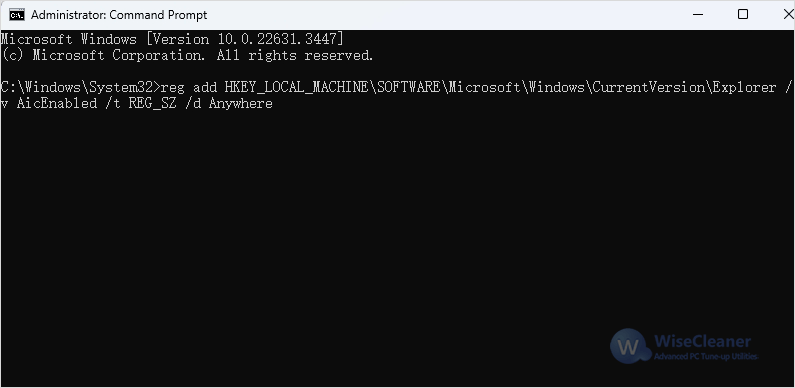
 Type the following command

Method 4: Using the Registry Editor

You can also use the Registry Editor to modify the App Install Control permissions. Remember to back up the registry before making any changes.
  • Press the Windows key, type Registry Editor, and click Run as administrator.
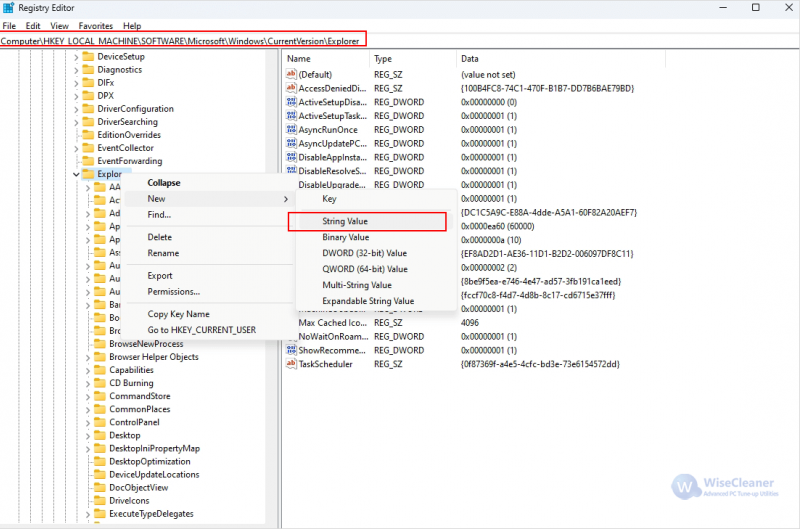
  • Navigate to HKEY_LOCAL_MACHINE > SOFTWARE > Microsoft > Windows > CurrentVersion > Explorer.
  • Right-click Explorer, select New > String Value and rename this new value to AicEnabled.
 select New  String Value
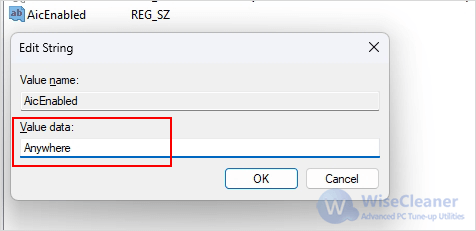
  • Double-click AicEnabled, then enter Anywhere in Value data and click OK.
 enter Anywhere in Value data

Conclusion

Turning off Microsoft-verified apps can provide greater flexibility in the installation of apps. You can choose from the four methods mentioned in this article to suit your situation.

Latest
How to Add & Remove Widgets on WindowsTop 10 Chrome Keyboard Shortcuts You Should KnowHow to Enable or Disable Reserved Storage on Windows 11
Read more >>
Recommend
Understanding Windows Power Plans: Balanced, Battery Saver, High Performance, and Ultimate PerformanceHow to Pause Windows Update for 100 YearsShould I enable or disable Trim of SSD?
Read more >>
Hottest
How to Install a macOS in VMware Workstation PRO 17How to Enable Task Manager Option in Taskbar Menu on Windows 11How to Fix Office Application Error 0xc0000142
Read more >>

wisecleaner uses cookies to improve content and ensure you get the best experience on our website. Continue to browse our website agreeing to our privacy policy.

I Accept